GLandGo App User Guide
Key Steps · English Interface Walkthrough
Learn how to perform manual field measurement step-by-step: create a new task, place boundary points on the map, save your records with notes and photos, and view or edit them anytime in Records. Screenshots display simulator demo data; map labels may reflect local languages.
1. Create New Measurement
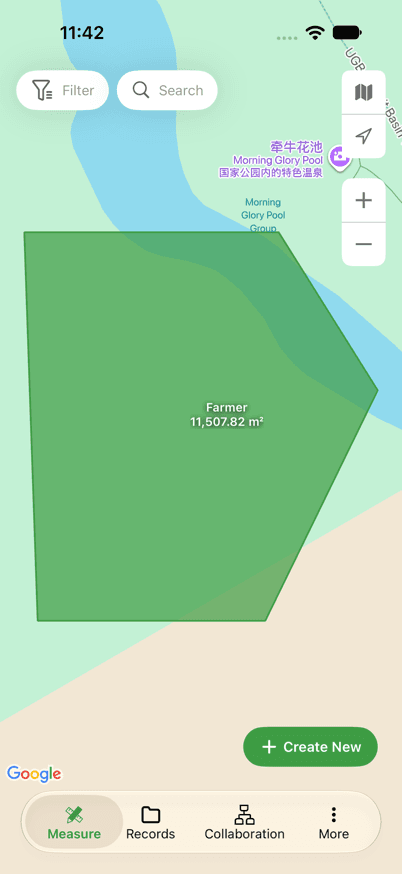
Open the Measure screen in GLandGo and tap the green Create New button in the bottom right corner.
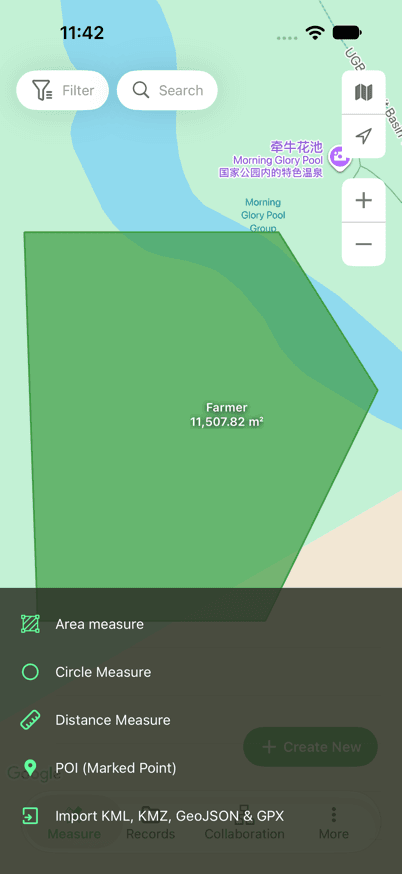
In the pop-up measurement menu, select Area measure, then tap Manual Measurement.
Other Available Types:
GLandGo also provides versatile measurement and point-marking modes suited for farming, land surveying, and forestry work:
Measure multi-segment path lengths, field roads, or fence perimeters
Measure circular irrigation pivots or radial service zones
Pin landmarks, water outlets, obstacles, or soil sampling locations
2. Draw Boundaries
Pan and zoom the map to pinpoint your target field or land parcel.
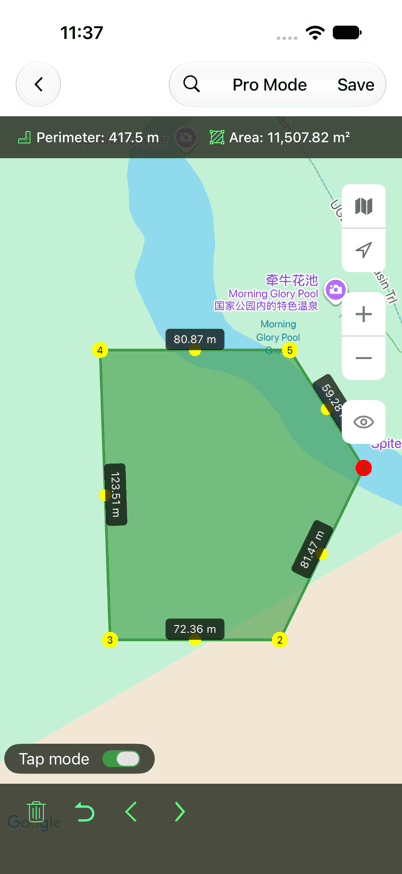
Keep Tap mode toggled on, then tap sequentially along the boundary edges to drop vertices. Add at least three non-collinear points for an area, and avoid crossing lines.
Check the live Area and Perimeter calculations displayed at the top of your screen. If you misplace a point, tap the Undo button on the bottom bar to retract it.
Dynamic polygon area calculation supporting acres, hectares, square meters, square feet, and more
Cumulative border length, ideal for fencing cost estimation and trench planning
3. Save Record
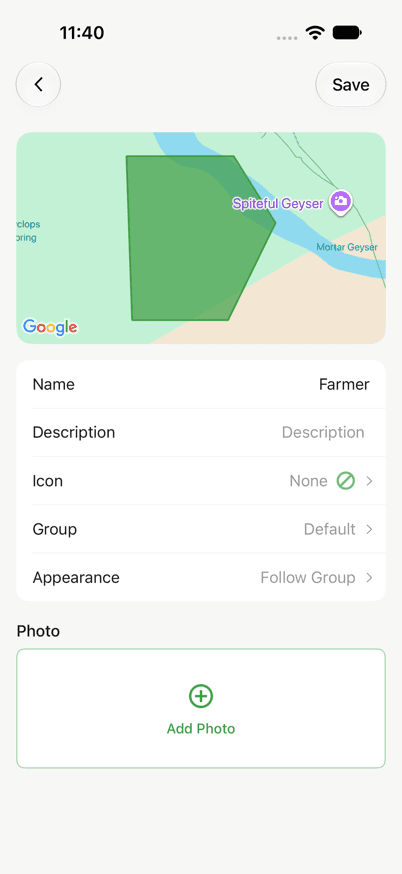
Once your boundary is complete, tap Save in the top right corner of the screen.
In the save dialog, enter a title in the Name field. Optionally fill in Description, assign a Group folder, or attach on-site photos.
Tap Save again in the upper right corner to securely save your field record locally and to the cloud.
4. View and Manage Records
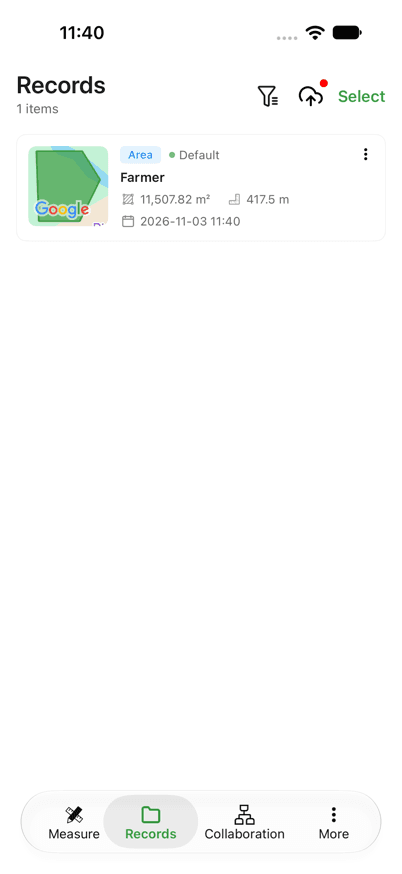
Tap Records on the bottom navigation bar to browse your saved surveys. Tap any entry to inspect map tracks and detailed metrics. If edits are needed, open the action menu in the top right corner:
Update field title, description, category group, or add/remove photo attachments
Re-enter map editing mode to adjust vertices, drag points, or insert new corner markers
Important Usage Notes
Pro Tips for Field Surveyors
High-Res Satellite View
Tap the layers button to toggle between standard map, high-resolution satellite imagery, and hybrid views to easily spot boundary ridges and natural markers.
Precision Magnifier Loupe
Long-press and drag any vertex to reveal a precision magnifier crosshair, ensuring you snap points accurately onto fence corners or tree lines.
Versatile GIS & CAD Exports
Export saved surveys into KML, KMZ, DXF (AutoCAD), GeoJSON, SHP (Shapefile), and CSV formats for seamless desktop GIS workflows.
Multi-Device Team Sync
Need multiple surveyors on the same property? GLandGo for Teams enables real-time collaborative mapping with synchronized cloud workspaces.
Frequently Asked Questions
Q1.How do I remove or move an incorrectly placed point?
While measuring, tap the Undo icon on the bottom toolbar to remove the latest point sequentially. On saved records, open the record in Records, select 'Edit shape', and drag the point or tap to delete it.
Q2.Can I walk the perimeter and measure with GPS automatically?
Yes! When starting a new measurement, select 'GPS Measurement' instead of 'Manual Measurement'. Turn tracking on, then walk or drive around your boundary to log the polygon automatically.
Q3.How can I change measurement units (acres, hectares, square feet)?
Go to the Settings menu. Under the 'Units' section, you can independently configure Area units (Hectares, Acres, Square Meters, Square Feet, etc.) and Distance units (Metric or Imperial).
Q4.How do I share records with colleagues or clients?
Open any saved record and tap the Share button in the top right. You can generate an instant web viewing link, export a clean map screenshot, or share raw KML/DXF files via email or messaging apps.
Start Measuring Fields with Confidence
Whether you manage agriculture acreage, plan landscaping, or conduct real estate surveys, GLandGo delivers fast, precise, and dependable results.


Related Resources & Tools
Area Calculator App Guide
Comprehensive insights into measuring agricultural fields and land acreage using GPS technology.
Map Measurement Guide
Free online tools and methods to calculate distance, land area, and radius on interactive maps.
GLandGo for Teams
Real-time collaborative surveying for agricultural teams, contractors, and field surveyors.